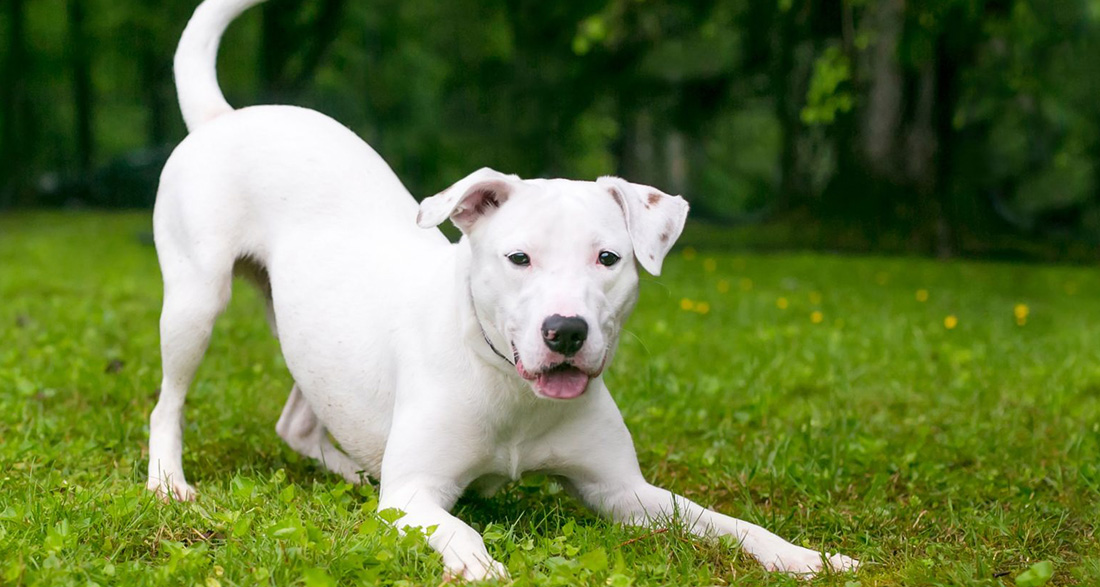
Who is this trick for?
This trick is excellent for starting with trick training. Moreover, this exercise is executed very calmly—perfect if your dog quickly gets “wound up,” and you desire relaxed training sessions. Every dog, regardless of size, can bow.
How do I teach my dog to bow?
This trick is best practiced using a clicker, a training tool. The “click” sound of the clicker allows precise confirmation of your dog’s behavior. Therefore, you should start with clicker conditioning if your dog is not familiar with it.
Step 1
Take a clicker and some soft, easily consumable treats. Now, sit on the floor facing your dog. Your furry friend is in for a great exercise because he doesn’t have to do anything at this point. You simply click once and give him a treat afterward. Then, click again and give him another one. Repeat this many times. Throughout the conditioning, your dog should understand that a click means an immediate treat, so: Click = Treat.
If you’re unsure whether your dog has understood this, you can click later, for example, when your dog is playing or dozing in another room and is not in training mode. Wait to see if your dog comes running. If he does, he has surely grasped the principle and gets a small treat even now.
Step 2
Now onto the trick. Sit down on the floor next to your dog and bring him to a standing position—this is the starting position. To make him bow, take a treat and guide it from his nose down between his front paws toward the chest. Your dog should now bow down to reach the treat. If your dog moves backward, leave it uncommented and repeat the process. Especially at the beginning, reward every movement in the right direction with a click to make it easier for your dog.
If he performs the bow, it’s crucial to quickly reward him in the correct position before he lowers his front end and lies down. If you react too quickly, he will understand that he is only rewarded for lowering the front end.
Step 3
Fantastic, your furry friend is already moving into the right position with assistance and bowing. Now, he needs to hold this position a bit longer. Proceed as usual and guide your dog into bowing. Now, as before, give him a treat, skipping the clicker this time. Immediately give him another treat, and perhaps another one, as long as he holds the position. Since there’s a high chance he might lie down, you should release him before he can do that. If he lies down, it’s not a problem. Bring him back to the starting position and try again.
Step 4
To make this trick a bit fancier, you should get into an upright position. Your dog should stay in the bow without the assistance of your guiding hand. You can try this by placing him in the bow position normally, then removing your hand and gradually standing up from time to time. Beforehand, give your furry friend a signal to wait, like “Stay” or “Wait“—depending on what your dog has learned. Attempt to extend the time your dog holds the position. Every second longer is a great success!
Tip:
Every dog has its individual learning pace. If you notice your dog struggling with a particular step, simply take a step back and progress very slowly. Since dogs learn in a contextual manner, it will be challenging for your dog if you suddenly assume a different posture. Experiment to see how much your dog can be influenced and still demonstrate what he has learned.
If you want to introduce a verbal cue, do so only when the entire process is correct. Additionally, it’s usually more sensible to introduce a specific gesture that you consistently repeat in training, such as bowing yourself, as dogs associate gestures much better than words.


